Using Objective-C with Swift
Swift is a cool high-level programming language, but it’s still quite young and doesn’t have as many libraries and components as Objective-C. But this problem can be worked around with the help of bridging headers; we can import Objective-C class headers and they will be available in Swift.
The Objective C++ solution
But what can we do if we need to use project code in Swift which was written in C++? In Objective-C there are several ways to use C++ code. The most simple and trivial is to change the file extension to the implementation of the class (from *.m to *.mm) and use Objective C++ as a wrapper for the C++ code (or write the whole project in Objective C++ so that there won’t be a problem with the imported headers file). This variant can also be used in Swift, here’s how:
1) In a Swift project we add source files in С++
2) Write a wrapper class for the C++ code in Objective-C++.
3) Add the header file of the wrapper class to the bridging header file.
4) Use the wrapper class in Swift.
Examples
Example 1: Using С++ source files in a Swift-project.
Run Xcode and create “Simple View Application”. Fill in the basic project info. (name of project, name of organization, identifier of organization). We choose “Swift” as the language, device – “Universal”, don’t use “Use Core Data” and then choose a place to save the project.
Add to the project a new C++ source file, enter the name and tick “Also create a header file”. When asked “should we add “Bridging header” to the project”, answer yes.
Open this newly created header file and add a description of the class interface:
#include <string>
class TestCppClass {
public:
 TestCppClass();
 TestCppClass(const std::string &title);
 ~TestCppClass();
public:
void setTitle(const std::string &title);
const std::string &getTtile();
private:
std::string m_title;
};
In the *.cpp file we add the implementation of our class:
#include "TestCppClass.h"
TestCppClass::TestCppClass() {}
TestCppClass::TestCppClass(const std::string &title): m_title(title) {}
TestCppClass::~TestCppClass() {}
void TestCppClass::setTitle(const std::string &title)
{
 m_title = title;
}
const std::string &TestCppClass::getTtile()
{
 return m_title;
}
Add to the project a new “Cocoa Touch Class”. Choose Objective-C as the language, we’ll inherit from NSObject. Rename the *.m file *.mm
In the *.h file write :
#import <Foundation/Foundation.h>
@interface TestCppClassWrapper : NSObject
- (instancetype)initWithTitle:(NSString*)title;
- (NSString*)getTitle;
- (void)setTitle:(NSString*)title;
@end
In the *.mm file write:
#import "TestCppClassWrapper.h"
#include "TestCppClass.h"
@interface TestCppClassWrapper()
@property TestCppClass *cppItem;
@end
@implementation TestCppClassWrapper
- (instancetype)initWithTitle:(NSString*)title
{
 if (self = [super init]) {
self.cppItem = new TestCppClass(std::string([title cStringUsingEncoding:NSUTF8StringEncoding]));
 }
 return self;
}
- (NSString*)getTitle
{
return [NSString stringWithUTF8String:self.cppItem->getTtile().c_str()];
}
- (void)setTitle:(NSString*)title
{
self.cppItem->setTitle(std::string([title cStringUsingEncoding:NSUTF8StringEncoding]));
}
@end
As you can see, in the wrapper class we’ve added a pointer to the C ++ class in a separate field. Also we’ve wrapped C++ calls methods class with Objective-C code and given input/output data types compatible with C++ and Swift/Objective-C types. All that’s left is to import the source file of our wrapper class into the bridging heаder, then we should be able to call C++ methods from Swift.
Add the viewDidLoad method to our viewController:
 super.viewDidLoad()
 let wrapperItem = TestCppClassWrapper(title: "Init test text for cpp item wrapper class")
 println("Title: (wrapperItem.getTitle())")
 wrapperItem.setTitle("Just yet another test text setted after cpp item wrapper class init")
 println("Title: (wrapperItem.getTitle())")
 }
In the debug console we will see:

Its works!
Example 2: Use a prebuilt library written in C ++ in a Swift project.
Almost everything is the same as in the previous project: create project, add the prebuilt library to the project and add the route to the library’s source file to the settings. In our example, we’ll use the libtorrent library. Why this one? It just happened to be on hand and already assembled.
Code of wrapper class header:
#import <Foundation/Foundation.h>
@interface LibtorrentWrapper : NSObject
- (void)initSession:(NSInteger)fromPort toPort:(NSInteger)toPort;
- (void)addNewTorrentFromFile:(NSString*)filePath;
@end
Code with implementation of wrapper class:
@interface LibtorrentWrapper()
@property libtorrent::session *session;
@end
@implementation LibtorrentWrapper
- (void)initSession:(NSInteger)fromPort toPort:(NSInteger)toPort
{
 self.session = new libtorrent::session();
 libtorrent::error_code ec;
 self.session->listen_on(std::make_pair(fromPort, toPort), ec);
 if (ec) {
 NSLog(@"Failed to open listen socket: %s", ec.message().c_str());
 return;
 }
}
- (void)addNewTorrentFromFile:(NSString*)filePath
{
 libtorrent::add_torrent_params params;
 params.save_path = [self applicationDocumentsDirectory];
 libtorrent::error_code ec;
 params.ti = new libtorrent::torrent_info([filePath cStringUsingEncoding:NSUTF8StringEncoding], ec);
 if (ec) {
 NSLog(@"%s", ec.message().c_str());
 return;
 }
 self.session->add_torrent(params, ec);
 if (ec) {
 NSLog(@"%s", ec.message().c_str());
 return;
 }
}
- (const std::string)applicationDocumentsDirectory {
NSArray *paths = NSSearchPathForDirectoriesInDomains(NSDocumentDirectory, NSUserDomainMask, YES);
NSString *basePath = ([paths count] > 0) ? [paths objectAtIndex:0] : nil;
return std::string([basePath cStringUsingEncoding:NSUTF8StringEncoding]);
} @end
As you can see, everything is the same as in the first example, that is, we wrap calls to C ++ code with Objective C ++, and cast to produce the necessary data types where appropriate.
override func viewDidLoad() {
 super.viewDidLoad()
 var torrentWrapper = LibtorrentWrapper();
 torrentWrapper.initSession(6881, toPort: 6889)
 let path = NSBundle.mainBundle().pathForResource("debian", ofType: "torrent")
 torrentWrapper.addNewTorrentFromFile(path)
 }
Don’t forget to add some sort of test *.torrent file to the project (for example we could use the *.torrent file from the Debian net install image, that way we definitely won’t break any copyright rules) and in the project settings in “Build Phases” add this file to “Copy Bundle Resources”.
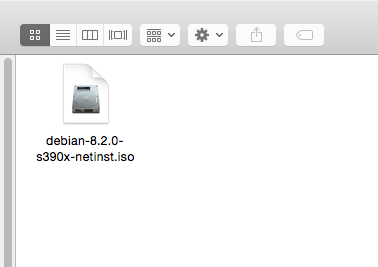
Run the project in a simulator (it’s easier to get access to the file system of the simulator than that of a real device) and shortly we should see the downloaded file in the applications “Documents” folder.

Application (and library ) is working!